

0. 開始之前
我準備了一篇針對對數位圖像處理感興趣或需要在實際項目中進行圖像處理的開發人員的文章。
從照片中去除背景或提取主要顏色在數位藝術、網頁開發、移動應用程式、機器學習項目等各種領域中都有應用。
要執行這些任務似乎需要複雜的算法或高級技術,但實際上這是一件非常簡單的事情。
通過使用 FastAPI、rembg 和名為 extcolors 的 Python 函式庫,您可以輕鬆地將這些任務製作成 API,以便在各種應用程式中使用。在這篇文章中,我將逐步指導您如何結合這三個工具來構建強大的圖像處理 API。
1. 建立 FastAPI 基本結構
1.1. 安裝所需套件
安裝 fastapi 和 uvicorn 以運行它們。
pip install fastapi
pip install uvicorn
1.2. 輸出 Hello world
在 main.py 中編寫以下代碼:
# 패키지 import
from fastapi import FastAPI
import uvicorn


# Helper 함수 작성
# app = FastAPI()


# Endpoint 함수 작성
# # 루트 페이지("/") 접속 시 "Hello": "world" return
@app.get("/")
def read_root():
    return {
        "Hello": "world"
    }


if __name__ == "__main__":
    uvicorn.run(app, host='0.0.0.0', port=5000)
將主機設置為 '0.0.0.0',端口設置為 5000。
1.3. 運行 uvicorn 伺服器
在終端機中輸入以下內容:
uvicorn main:app --reload
INFO:     Will watch for changes in these directories: ['PROJECT_DIRECTORY_PATH']
INFO:     Uvicorn running on <http://127.0.0.1:8000> (Press CTRL+C to quit)
INFO:     Started reloader process [9982] using StatReload
在 http://127.0.0.1:8000 上運行了 uvicorn 伺服器!
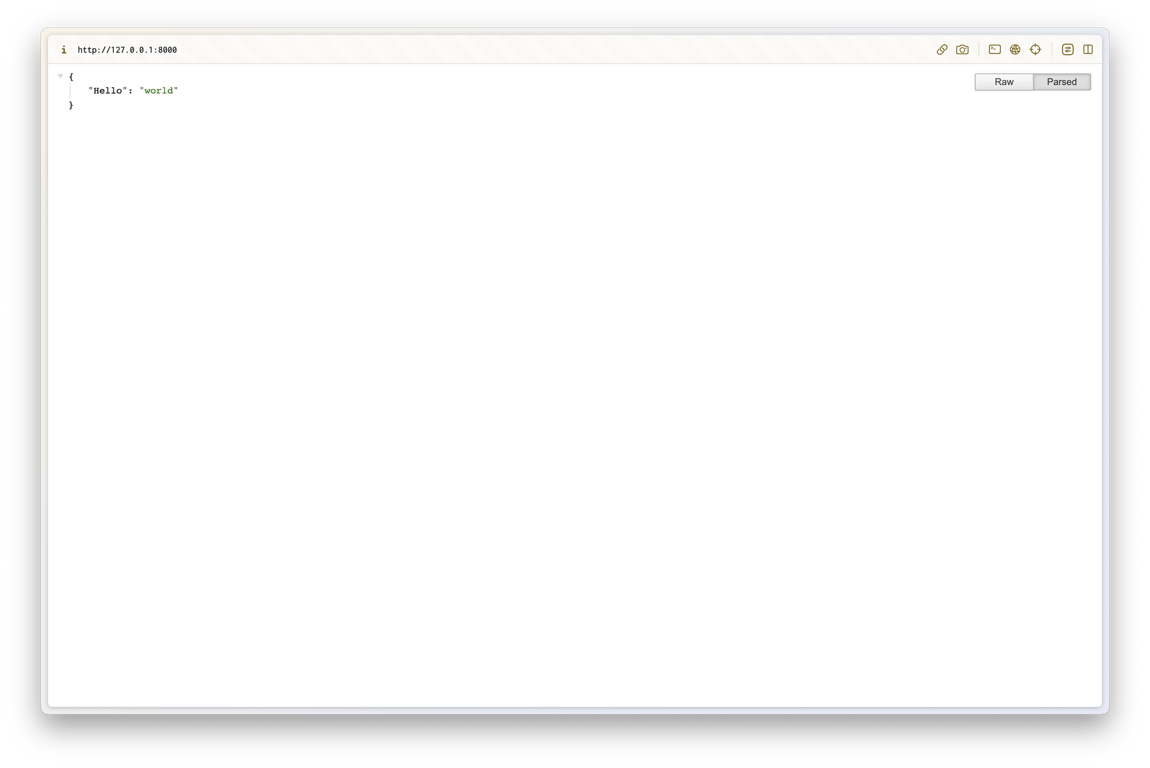
當訪問根目錄時,您應該能夠看到正確的返回值。
2. 創建去除背景和提取顏色的 API
2.1. 安裝所需套件
安裝創建 API 所需的套件:
pip install image
pip install rembg
pip install extcolors
導入如下:
import os
import request
from PIL import Image
from extcolors import extract_from_image
from rembg import remove
2.2. 圖像保存輔助函數
首先,讓我們創建一個輔助函數,該函數接收圖像 URL 並保存圖像文件。
在 HTML 的 <img> 標籤中有一個 src 屬性,以下函數將訪問該屬性並檢索圖像文件。
def save_image(image_url):
    response = requests.get(image_url)

    # 이미지 저장 디렉토리
    download_dir_name = 'downloaded_images'
    if response.status_code == 200:
        # 파일 이름 얻기
        image_name = os.path.basename(image_url)

        # 파일 이름에 확장자 없다면 추가
        exts = [".jpg", ".jpeg", ".png", ".gif"]
        ext_included = False
        file_ext = None
        for ext in exts:
            if ext in image_name:
                ext_included = True
                file_ext = ext
                break

        if ext_included:
            image_name = image_name.split(file_ext)[0] + file_ext
        else:
            image_name += ".jpeg"
            file_ext = ".jpeg"

        # 저장 경로 없다면 생성
        if not os.path.exists(download_dir_name):
            os.makedirs(download_dir_name)

        # 파일 경로 얻기
        image_path = os.path.join(download_dir_name, image_name)

        # 파일 저장
        with open(image_path, 'wb') as f:
            f.write(response.content)

        result = {
            "message": "Image saved successfully!",
            "status_code": response.status_code,
            "image_path": image_path,
            "image_name": image_name,
            "file_ext": file_ext
        }
        return result
    else:
        return {
            "message": "Failed to save image",
            "status_code": response.status_code
        }
2.3. 將 RGB 轉換為十六進位的輔助函數
有多種顯示顏色的方法,在這個 API 中,我們將提取顏色並提供 RGB 和 HEX 資訊。
讓我們創建一個輔助函數,該函數從圖像中提取顏色轉換為 RGB,然後將其轉換為 HEX。
def rgb_to_hex(rgb_tuple):
    r = int(rgb_tuple[0])
    g = int(rgb_tuple[1])
    b = int(rgb_tuple[2])
    return '#' + hex(r)[2:].zfill(2) + hex(g)[2:].zfill(2) + hex(b)[2:].zfill(2)
2.4. 去除背景端點函數
http://127.0.0.1:8000/rembg/{IMAGE_URL}
當訪問此類 URL 時,將保存圖像,去除背景後返回圖像路徑和圖像名稱的端點函數。
@app.get('/rembg/{url:path}')
def remove_image_background(url: str):
    image_info = save_image(url) # 이미지 저장
    image_path = image_info["image_path"]
    image_name = image_info["image_name"]
    file_ext = image_info["file_ext"]
    image_name_without_ext = image_name.rsplit(file_ext, 1)[0]

    image = Image.open(image_path).convert('RGBA')
    output = remove(image)

    convert_dir_name = 'converted_images'

    # 저장 경로 없다면 생성
    if not os.path.exists(convert_dir_name):
        os.makedirs(convert_dir_name)

    out_image_path = os.path.join(convert_dir_name, f'{image_name_without_ext}_rembg.png')
    output.save(out_image_path, 'PNG')

    result = {
        "message": "The background of the image is successfully removed",
        "image_path": out_image_path,
        "image_name": image_name
    }
    return result
執行結果:
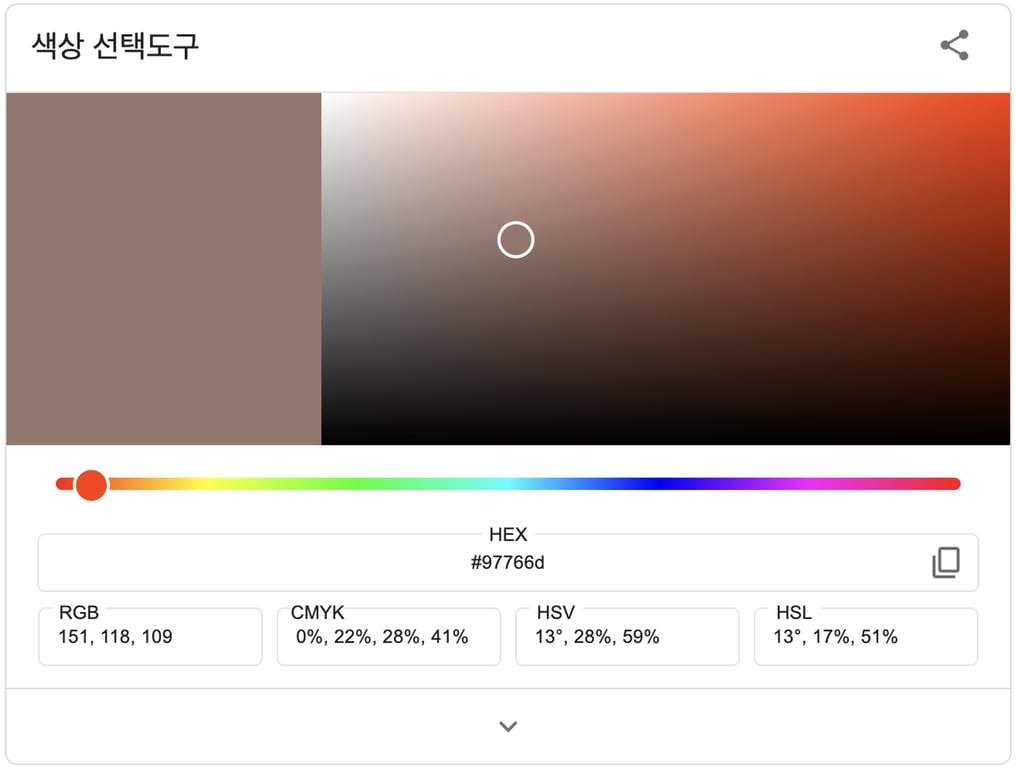
我輸入了以下圖像的 URL 進行執行:

成功收到去除背景後的圖像保存路徑和圖像名稱。
在專案目錄中,您也可以確認圖像已經正確保存。
converted_images/ 目錄中應該有一個去除白色背景的 PNG 圖像。
2.5. 提取顏色資訊端點函數
http://127.0.0.1:8000/extcolors/{IMAGE_URL}
當訪問此類 URL 時,將保存圖像後返回顏色資訊、圖像路徑和圖像名稱的端點函數。
http://127.0.0.1:8000/extcolors/{IMAGE_URL}?rembg=True
此外,我們將添加 rembg 選項,以選擇是否在去除背景後提取顏色。
注意
如果圖像 URL 中已經包含?,則?rembg=True不會生效。
在這種情況下,請將?更改為&。
@app.get('/extcolors/{url:path}')
def get_image_color(url: str, rembg: bool = False):
    if rembg:
        result = remove_image_background(url)
        image_path = result["image_path"]
        image_name = result["image_name"]
    else:
        result = save_image(url)
        image_path = result["image_path"]
        image_name = result["image_name"]

    converted_image = Image.open(image_path)
    colors, pixel_count = extract_from_image(converted_image, tolerance=30, limit=3)

    most_colors = {}

    pixel_output = 0
    for idx, color in enumerate(colors):
        pixel_output += color[1]
        color_rgb = list(color[0])
        color_ratio = round((color[1] / pixel_count) * 100, 2)
        color_pixels = color[1]

        most_colors[idx] = {}
        most_colors[idx]["RGB"] = color_rgb
        most_colors[idx]["HEX"] = rgb_to_hex(color_rgb)
        most_colors[idx]["RATIO"] = f'{color_ratio}%'
        most_colors[idx]["PIXELS"] = color_pixels

    result = {
        "rembg": rembg,
        "message": "Image saved successfully.",
        "image_name": image_name,
        "image_path": image_path,
        "most_colors": most_colors
    }

    return result
執行結果:
我輸入了相同的圖像 URL。
2.5.1. 未使用 rembg 選項
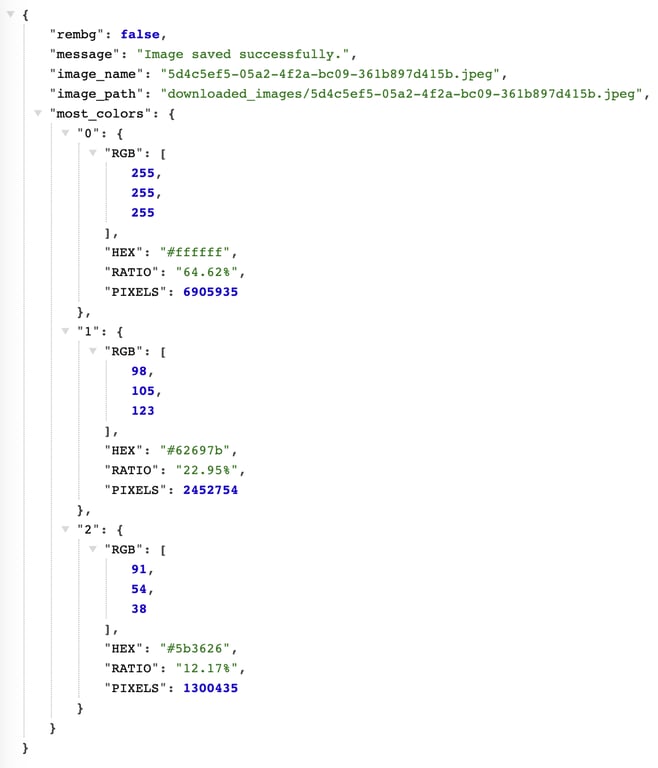
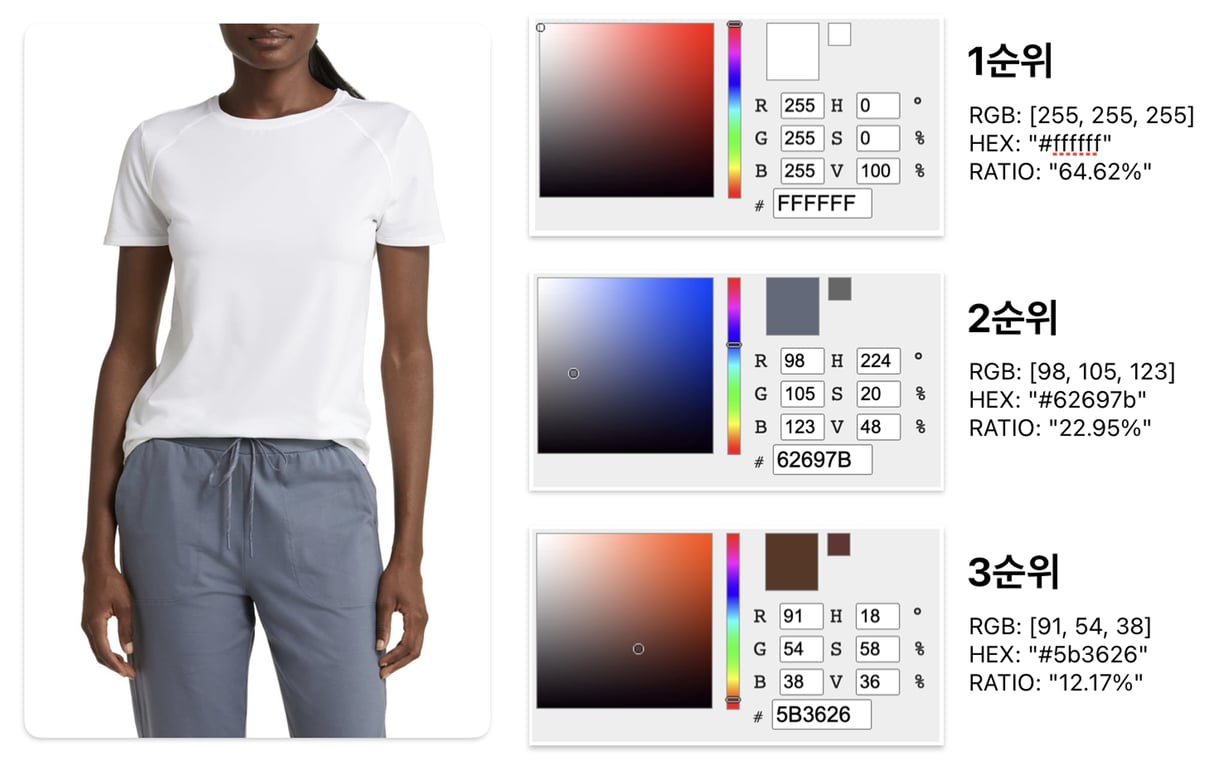
如您所見,在未去除背景的圖像中,白色背景佔約 64% 是最主要的部分,其次是褲子顏色和皮膚顏色。
上衣顏色不是 RGB(255, 255, 255),因此並未影響第一優先顏色的百分比。
2.5.2. 使用 rembg 選項
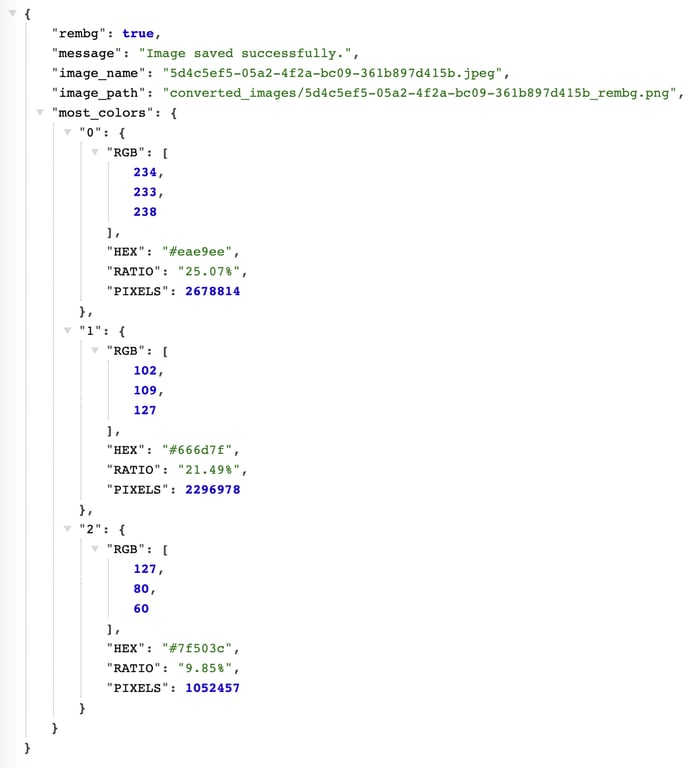
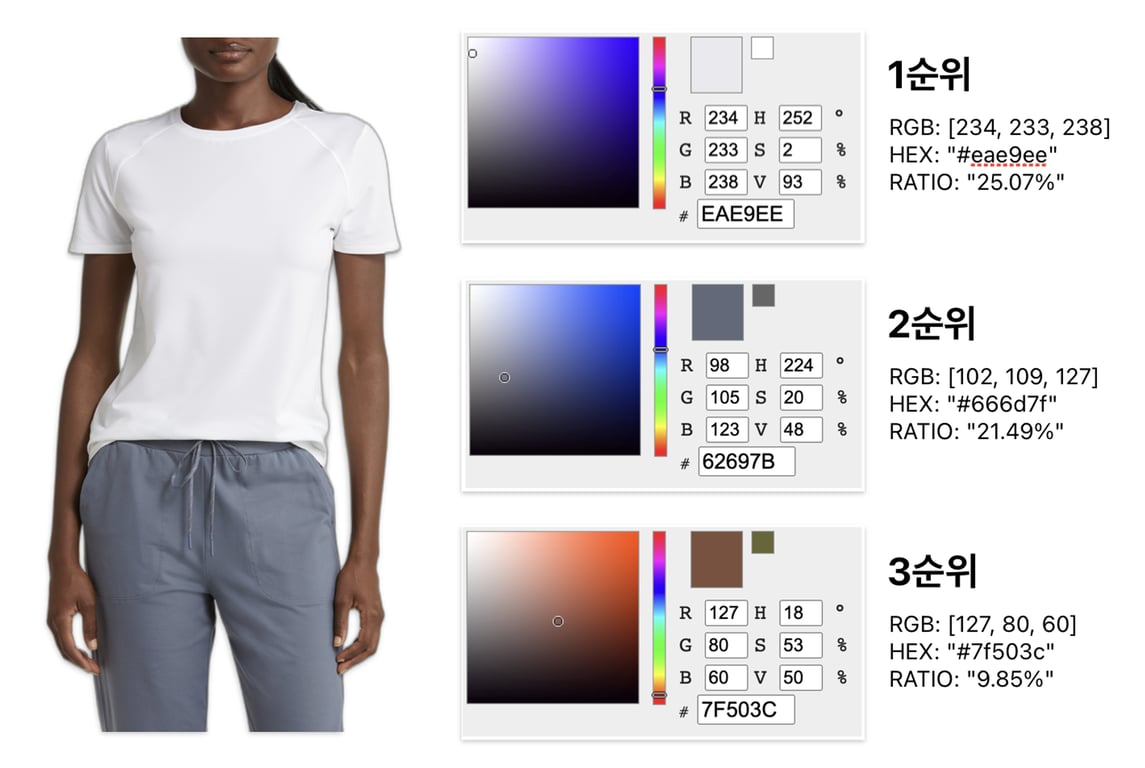
在去除背景的圖像中,上衣顏色佔約 25% 是最主要的部分,其次是褲子顏色和皮膚顏色。
3. 結論
通過使用 FastAPI、rembg 和 extcolors 函式庫,我們實現了一個簡單而有效的圖片背景去除和顏色提取 API。從這個項目中獲得的一個主要見解是,去除背景後可以更準確地分析顏色。
通常在分析圖像顏色時,背景顏色可能與主要對象的顏色混合,很難獲得準確的結果。在這個項目中,去除背景後提取顏色,可以更準確地分析目標對象的顏色。
這項工作過去可能需要聘請熟練的設計師或 Photoshop 用戶來完成,現在可以通過簡單的編碼自動化,這是非常有意義的。
希望這篇文章對您有所幫助。
也可以閱讀這篇文章:
數據收集,現在自動化
在不編碼的情況下,5 分鐘即可開始 · 5,000 多個網站爬蟲經驗


